|
|

|
|
All use of my digital work is covered by this
Creative Commons Deed.
Please do not use any of my work for commercial purposes, thank you. |
|
|
|
|
Rock Wall Detail (4 of 4)
|

|
|

|
|
|
|
|
 |
|
|
|
 |
|
One of the problems with the square brushing shearing method is that all of the template
segments have to be moved in the same direction. For example if the template is moved
upwards, all of the segments have to be move upwards together. This is the same for any direction
the template is sheared / moved in.
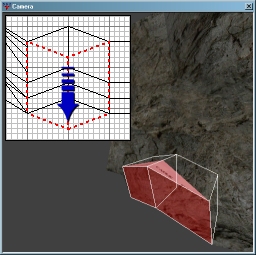
One solution to this problem is to break the overall direction of the segments so that
some of the segment go in a different direction. This can be used to create more unique
brushwork or even add/remove segments.
In this example two of the new templates will be used to highlight the possibilities of
breaking the brush shearing pattern. Take the bottom two segments of the templates and shear them
outwards further so that they look similar to the image to the side.
|
|
|
|
|
 |
|
|
|
|
|
|
 |
|
|
|
 |
|
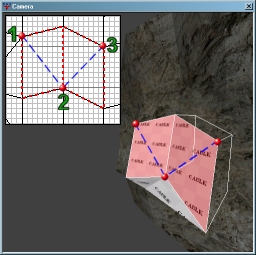
To close up the gap in the brushwork some of the segments (as shown in the image to the
side) will need to be cut up into triangle brushes. The red dots show where the clipper
tool markers need to be and the blue lines shows the cutting angles. The numbers in green are cutting
position used by this text.
Select both brushes, make a copy and then hide them from view. Select the left brush and cut from
position 1 to 2. Select the right brush and cut from position 2 to 3.
Select both triangle brushes first and then use the 'un-hide' (SHIFT+H) function.
With both triangle brushes still selected, use the hide function so that you are only left with the previously
copied brushes. Select the left brush and cut from position 2 to 1. Select the right brush and cut
from position 3 to 2.
|
|
|
|
|
 |
|
|
|
|
|
|
 |
|
|
|
 |
|
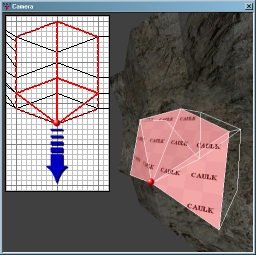
Show all previously hidden brushwork so you are left with 4 triangle brushes. The square brushes
have now been broken down into triangle form and will be easier to vertex edit into position.
Select all of the triangle brushes and press the 'V' key to enter into vertex editing mode.
Select the point (Shown as a red dot in the image to side) and drag it forward to meet the existing
brushwork. Press the 'V' key again to exit the vertex mode.
Check that the vertex mode has not created any damaged or broken brushwork by performing a brush cleanup
on the map. In GTK this function is under the plugin menu, in SD radiant this function is on the toolbar as
two arrows going round in a circle.
|
|
|
|
|
 |
|
|
|
|
|
|
 |
|
|
|
 |
|
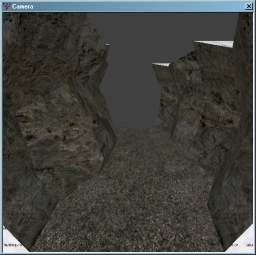
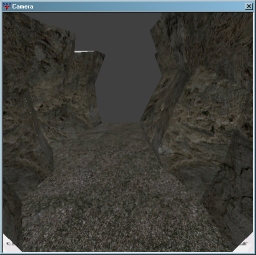
Once all the brushwork is in place and textured, the new wall detail can add a nice touch to any existing
rockwork location. If this detail system is sprinkled lightly across an entire rock area then
it can help break up the samey look found from using one template.
It is often tempting to leave a first pass on detail and move on to more interesting sections.
By spending extra time creating more unique brushwork details, it will allow players to recognise
areas much quicker and help gameplay.
Organic brushwork should always feel more random and certainly not go in straight lines.
Adding additional cover spots to existing areas is always a good thing for gameplay and something which
should be not overlooked.
|
|
|
 |
|
The square brush method of creating rockwork can be a fast and effective way of blocking out areas quickly.
When coupled with the flexibility of triangle brushes for fine detail, it stops the whole map
descending into a triangle brush soup. This allows the map to still be easy to navigate while editing.
A map can often go through a lot of different changes over time and the brushwork needs to be flexible
enough to cope. It is always a good idea to keep all brushwork templates in their axially aligned form
so existing sections can be changed quickly and easily.
Always make regular backups of your map and never work from one revision. It is always easier to roll
back to a previous version than it is to create something from scratch again.
|
|
|
|
|
 |
|
|
|
|


