|
|
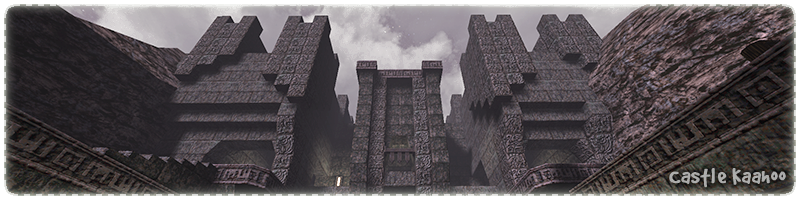
What started out as a speed mapping session using the theme of Castle of Koohoo
by Vondur turned into a three day mapping session using large amounts of
monolithic bricks and experimenting with various ideas of vertical player progression.
The Castle of Koohoo
is an eclectic collection of heavily shadowed brick textures dripping in gloomy shadows and painted across vertical slices of
architectural festering in murky pools of swamp water.
The light from the stars above struggles to illuminate the depths of the castle below
and the players journey is punctuated by frequent bursts of enemies coming from all directions.
The textures used in Koohoo were originally from the game Heretic 2
by Raven Software and when they were converted over to Quake a few problems
appeared.
Most notable are the eclectic colours, heavy shadows and lots of visual details missing, like the incomplete
animation groups for buttons and the lack of different sizes for trim textures.
With a limited amount of time to create the map, one way to extend gameplay is to reuse the same area.
The was achieved by making the flow of the map
go through the front door, loop around on either side and then back across the front area to the exit.
This allowed for architecture to be mirrored (saving time) and the player to experience the map from
different heights.

|
|
The front facade of the castle was designed to be a visual wow moment first followed by a gentle introduction to combat.
The greatest mistake for any map designer is to overwhelm the player at the beginning, it is easy to forget that the
the player is new to the environment while the map designer knows every detail.
Starting a level for the first time is a lot of information to take in all at once and the pacing needs to be smooth.
The player needs to get familiar with the environment, understand where to go and be given a chance
enjoy the atmosphere and architecture.
|
Once inside the castle interior the corridor branches in opposite directions offering a choice to the player.
Left leads to a tall vertical space filled with sparse combat and jumping puzzles, while the right is a series
of staccato style combat and plenty of ledges to explore.
Each side joins together eventually at the top allowing the player the chance to carry on or explore the opposite side
in reverse.
Some players can accept the chance to play an area backwards while others think it is broken.
This is often dictated by the design of the game where players are expected to be moving forward all of the time
and when this situation is changed by the designer, it is labelled as a mistake.
Player expectations can often be difficult to change, especially if they have seen a similar situation
before and found it was an accident instead of by design.

|
|
The left path of the map is one giant vertical room with ledges, walkways and plenty of nail shooters to keep the player
on their toes. Monsters are waiting on high ledges to distract the player and let them wander into the
line of fire of ground level shooters.
The first objective is to unlock the teleporter on the ground floor by jumping over a pair of locked gates.
The locked area is hinted at by a flickering wall light and gaining access is via a jump from the central
walkway, which should hopefully hint to the player that jumping is going to be key to this room.
|
Once the button is pushed, the player is turned around via a monster placed up high and will hear the sound of the
ground floor teleport being unlocked. The front entrance doors will be opened if the player has entered this
area in reverse (jumped down) so that the second stage can be skipped.
On the second level the player is greeted by a few more monsters and then left to discover the final
movement puzzle of jumping between various ledges within a certain time frame. If the player should fall down
there are various safety nets around the room to help, a large pool of water, walkways and plenty of light fixtures to
reduce falling damage. To speed up the puzzle retry process there is a large teleporter on the ground floor.

|
|
The right path of the map is a large square room with the vertical space above fragmented by large walls, small ledges and
a split pair of lifts. The lower floor is a figure of eight with a central spike shooter to keep the player moving around
and an obvious locked door next to an glowing floor button.
The combat
starts when the button is pressed and one side of the room gradually opens up via a lovely set of staggered doors.
The monsters are setup to always start infighting and the player can either watch the spectacle or draw them
out to the center of the room.
|
The real surprise is the second wave of monsters on the opposite side of the room,
they are setup on a delayed timer. This creates a false sense of security, as the player will often
stand next to the unopened door thinking they are safe. As the second wave is reveals the player will usually
panic because the next wave of monsters has fiends and they can be deadly up close. To counter this surprise
the player is free to move outside of the area and use the front door as a chokepoint.
Even without locking the player in
this area, the combat situation can be deadly if the player does not move around. It just goes to show that
the typical gameplay idea of 'locking players in' during combat is not really necessary to create the
intensity of a combat situation.
If the player explores the area first there is a hidden wall button that will turn off the spike
shooters and reveal a way to open the central locked doors for a good prize.

|
|
The final part to the map is 'The Rite of Gold' which takes place on the second level
of the facade that overlooks the start area.
There are monster ambushes on either side, but if the player waits a short while a special set
of doors will open allowing the player the chance to surprise the monsters instead!
There is a teleporter shortcut opened on the ground floor when the second floor button is used,
but this is such a long distance away from the trigger that most people who tested the map did
not see the connection and ignored it.
|
The final objective is to get the gold key in the upper floor of the building opposite the castle facade.
On either side of this building is a button which must be pressed and in a really obvious way forces the player
to backtrack (extending gameplay) and fight additional enemies. Once the gold key has been picked up it is a
quick run for the exit, past some fiends and straight for the final teleporter where the player began their journey.
Lying on a broken walkway in the middle of the start area is a Rocket Launcher, which when picked up will
spawn a swarm of angry scrags far above in the skies and a couple of fiends below. There is nothing quiet like
the feeling of firing rockets at long range targets and seeing the smoke and particle trails drift slowly
towards pixel targets.
This area contains a couple of fun gameplay tricks and the first one is all about a deadly distraction.
While an army of scrags are causing the player to focus their attention upwards,
a couple of fiends are roaming around on the ground hoping for a deadly jump attack.
The second trick is a long narrow bridge with no cover, a large pack of knights and a hidden shambler.
The player is forced to think fast as the shambler creates a hide or die situation and the quick moving
knights push the player backwards with melee attacks while the shambler gets a couple of free strikes.
Even thou the map was made in several days I think it captures a lovely ancient feeling with the giant facade
and extremely tall interiors. The fact that the player has a choice of routes certainly will add to the replay
value of the map and the secrets are tough and varied enough to be worth hunting for. Overall the map was
a huge success in using rapid building technics and trying out some new ambush ideas.
|
|


)
)
)
)
 "Wow Moment")
 "Behind Bars")
 "Figure of Eight")
 "Long Distance Rockets")
